Valentine’s Crunch Mix

Valentine’s Day stuff is already happening around our house. Cards, treats, parties, and even a Valentine’s Day dance next week. So this weekend we decided to make a Valentine’s Day treat since the holiday was on our minds. We chose a classic treat – made a couple of changes and came up with this yummy snack.

January is over! I can’t believe that we made it through a whole month already! This year is flying by!

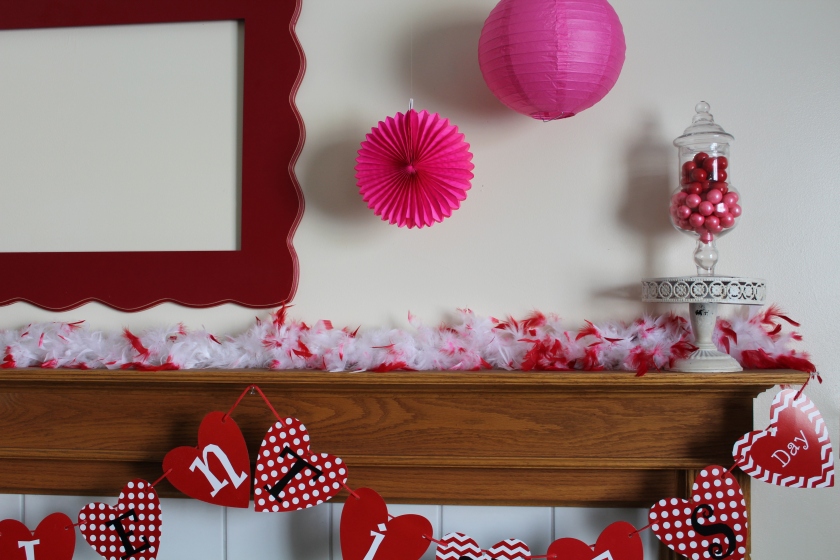
Since it is February I put out all of my Valentine’s Day decor and my girl’s have been excited to get some fun “Love Day” stuff happening. Cards, treats, parties, and even a Valentine’s Day dance this year. Oy!

IMG_0067

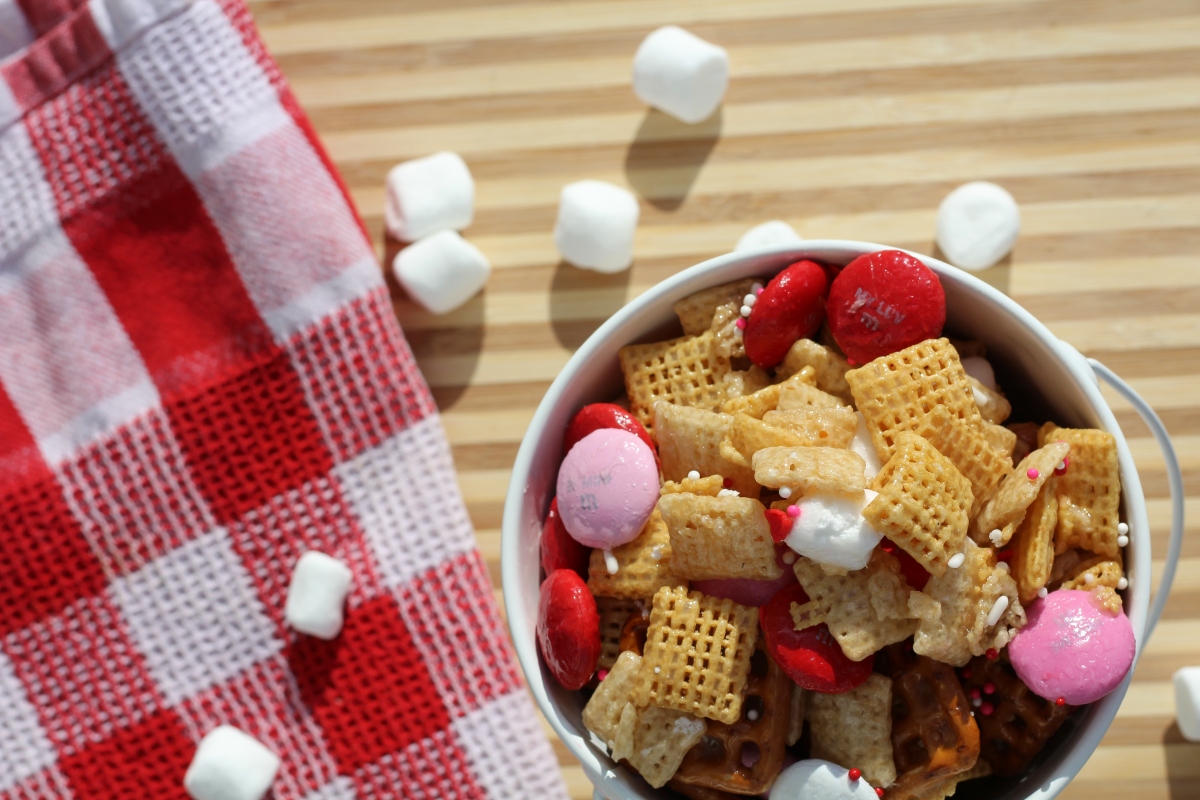
Last week we made these Easy Valentine’s Day Cupcakes. This weekend we decided that we needed to make another delicious Valentine’s Day treat. So I went to Pinterest. After looking around for a while I remembered that one of my Facebook friends had posted her cereal mix recipe last week. I went and looked it up. We made a couple of changes to make it fit our needs and came up with this yummy treat was was made and eaten up in less than 2 hours. Fortunately I have enough supplies to make it again to take to a party next week.

Valentine's Crunch Mix

  • Servings: 24
  • Difficulty: Easy
  • Print

This recipe is so easy to make – even the kids can help and it’s perfect for any Valentine’s Day party or just for a weeknight treat.

Ingredients

  • 6 cups Chex cereal (I used half rice and half corn)
  • 2 cups pretzels (I used the small square ones)
  • .75 cups light Karo syrup
  • .5 cup sugar
  • .5 cup butter
  • 1 cup plain Valentine’s Day M&M’s
  • 1 cup mini marshmallows
  • pink and red sprinkles

Directions

  1. Mix the cereal and pretzels in a large mixing bowl.
  2. Melt the butter in a medium saucepan.
  3. Add the Karo syrup and sugar to the melted butter.
  4. Heat together over medium heat until boiling.
  5. Boil for two minutes.
  6. Pour evenly over the cereal/pretzel mix and mix well.
  7. Add marshmallows and M&M’s and mix well.
  8. Spread mixture onto a greased cookie sheet and have the kids sprinkle the sprinkles over the top of the crunch.
  9. Allow to cool completely.
  10. If they don’t eat it all in one sitting (yeah, right) place the leftovers in an air tight container for tomorrow.

You can buy Valentine’s Day treat bags and use them to hand out your treat to friends and neighbors! My girls are making a double batch to take to their friend’s Valentine’s Day party before the school dance.

Quick Summer Pudding Dessert

You know how you crave the summer for the long, lazy days? You picture yourself sitting outside sipping lemonade while the kids play in the yard. We have not had one day yet with that kind of lazy time. I feel like everything this summer is just rushing by so fast and I don’t have time to stop and think, let alone do anything awesome in the food department. My girls commented that I had not made even one fun summer dessert yet. So I ran to the kitchen to see what I had in the cupboard. In 10 minutes I had a little treat ready for after dinner.

You know how you crave the summer for the long, lazy days? You picture yourself sitting outside sipping lemonade, eating fruit or cookies while the kids play in the yard. I don’t think we have had one day yet with that kind of lazy time. I feel like everything this summer is just rushing by so fast and I don’t have time to stop and think, let alone do anything awesome and special in the food department.

Last week my girls commented that I had not made even one fun summer dessert yet. I jumped to my defense and then realized that, um yeah, they were right. So I ran to the kitchen that minute to see what I had in the cupboard. That’s when I remembered that I hadn’t done a real official shopping since school got out! We had been traveling so much and eating out, oh man! I did find a few odds and ends and in 10 minutes I had a little treat ready for after dinner.

Vanilla Trifles

June 2014 036

So here is my amazing recipe:

  • 2 boxes vanilla pudding
  • bananas
  • 1 box Vanilla Wafers
  • whipping cream (whipped until peaks form)

Make the pudding according to the directions on the box. Grab a glass and layer pudding and bananas (you really can’t see the bananas in this picture). Top with crushed up Vanilla Wafers and whipping cream.

With this dessert the fancy glass made all the difference. Sometimes it is not how much time you spend on something, it is the fact that you spent any time at all. The kids were delighted and amazed. They thought I had spent a ton of time making beautiful individual desserts for them all afternoon.

I hope you are all enjoying your summer!


Girls Night With Treats and Wine

A couple nights ago we had an awesome girls night of dessert and wine pairing. The spread consisted of amazing chocolate covered strawberries and cheesecake (courtesy of Shari’s Berries), and chocolate cake (courtesy of yours truly). We paired them with Merlot, and Shiraz. Both a medium dry to cut all the sweet on our plates.

I love girls night with all my heart.  I have been blessed to have a group of girlfriends that I can laugh with, cry with, act like an idiot with, and still be encouraged to continue discovering the best me I can be. They have been there for me when I’ve been in a place I never want to find myself again, and supported me until I found a better place to be. I love my gals.

SB3

A couple nights ago we had an awesome girls night of dessert and wine pairing. The spread consisted of amazing chocolate covered strawberries and cheesecake (courtesy of Shari’s Berries), and chocolate cake (courtesy of yours truly). We paired them with Merlot, and Shiraz.  Both a medium dry to cut all the sweet on our plates.

SB1

Pairing wine with sweets

There are many schools of thought concerning wine and dessert pairing.  One that I agree with is; the darker the dessert, the darker the wine.  Chocolate desserts = reds fruit tarts = whites. I disagree with a common thought that the wine should be sweeter than the dessert.  If the dessert is particularly rich (like chocolate cake), a sweet wine (such as Port, which is commonly served with cake) is just overwhelmingly sweet.  Save the Port for a cheese and fruit platter.  Chocolate cake, and cheesecake need something mildly dry like Merlot or Shiraz.

DSC_1140

The cake

After much trial and effort, I have found the best chocolate cake recipe ever. In my opinion, a chocolate cake should be first and foremost packed with rich chocolate flavor, fuggy, and moist almost to the point of being dense (but not quite).  This recipe is all of those things.  The cake itself is very rich and, therefore, needs something lighter for filling and frosting.  I filled it with a fluffy stabilized whipped cream that’s similar to a Bavarian cream but lighter in flavor and texture.  I frosted it with a vanilla buttercream which tied everything together beautifully.   (Watch for the filling and frosting recipes)


Dark Chocolate Cake

  • 1¾ cups plus 2 tbsp. (9⅜ oz.) all-purpose flour
  • 1½ cups (4½ oz.) unsweetened cocoa powder
  • 1 tbsp coffee powder
  • 1½ cups boiling water
  • ¾ cup full-fat sour cream
  • 1 tbsp vanilla extract
  • 1½ cups (3 sticks) unsalted butter, at room temperature
  • 2½ cups plus 2 tbsp. (18⅜ oz.) sugar
  • 3 large eggs
  • 1¼ tsp. baking soda
  • ¾ tsp. salt


  1. This cake is so moist it needs to be made a day in advance and chilled so it won’t fall apart when you frost it.
  2. Preheat the oven to 350˚ F, spray 3 8-inch round cake pans with cooking spray, line with parchment, spray again, and lightly flour.
  3. In a medium bowl, combine the cocoa powder, espresso powder, and boiling water. Whisk until smooth; set aside to cool slightly. Whisk in the sour cream and vanilla and set aside.
  4. In the bowl of an electric mixer, beat the butter on medium-high speed until smooth. Gradually blend in the sugar and whip on medium-high speed until light and fluffy, about 5 min.
  5. Blend in the eggs one at a time, beating after each addition.
  6. In a medium bowl, combine the flour, baking soda, and salt; whisk to blend
  7. Add the dry ingredients in three additions alternating with the sour cream mixture, beating after each addition just until incorporated.
  8. Divide the batter evenly between the prepared pans. I weigh them with a food scale to insure even distribution.  I use magi-cake strips so they will be perfectly flat on top.
  9. Bake the cake layers for about 20-25 minutes or until a toothpick inserted in the center comes out clean
  10. Allow cakes to cool completely, then wrap each cakes in two layers of saran wrap and chill in the fridge.  They can also be wrapped in an additional layer of foil and frozen for up to 1 month.
  11. Fill and frost to your hearts content.


Easy Holiday Fudge

What is on that Holiday to-Do List?

  • Turkey thawing – check!
  • Lights on the outside trees – check!
  • Gift shopping (ordering online) – check!
  • Christmas Cards – check!
  • Pies in the oven – check!
  • Movie tickets ordered for Thanksgiving afternoon – check!

Now that all of those things are done I get to make goodies!

I love to bake during the holidays and there are so many great cookies and treats to make it is hard to decide what to do first. I decided that I would start with the fast and easy treats so that we have things to munch on and give away to people that come and visit early in the month. This Easy Holiday Fudge recipe is one that I have been using for years. It is a delicious, rich recipe that just about everyone loves. I say just about because I have one little one that “doesn’t do nuts” so I always pull some out before adding the nuts and make her her own tiny tray. This recipe is easy to alter to your taste so if you like almonds you can skip the walnuts and add almonds instead. If you don’t like nuts then you can skip them all together!

Easy Holiday Fudge

Fudge3

Ingredients

  • 20 ounces Hershey’s® milk chocolate bars, broken into pieces.
  • 1(12 ounce) package semi-sweet chocolate chips
  • 1 cup (2 sticks) salted butter, cut into pieces
  • 4 cups sugar
  • 1 (12 ounce) can evaporated milk
  • 2 1/2 cups mini marshmallows
  • 4 cups frozen mini marshmallows
  • 2 teaspoons vanilla extract
  • 2 cups walnuts, chopped

Directions

  • Put four cups of mini marshmallows in the freezer until frozen. I place them in a bowl (they won’t stick together) in the morning and then make the fudge in the afternoon.
  • In a large mixing bowl, place broken milk chocolate bars, chocolate chips and butter pieces; set aside.

fudge1

  • In a large pan, combine sugar, evaporated milk and 2 1/2 cups mini marshmallows. Bring them to a boil over medium heat while stirring constantly. (Seriously, don’t stop stirring, it will scorch.) Continue to cook and stir over a light boil for 7 minutes. This is a great way to get the kids involved. I let them take turns stirring.

fudge2

  • Remove the melted marshmallow mix from heat and immediately pour over the chocolate/butter mixture. With a wooden spoon, stir the mixture until the chocolate is melted and loses its shine. This will take a little while, just keep stirring. As the mixture cools it will lose its shine. Stir in the vanilla. Add the frozen marshmallows and walnuts pieces. Spread into a large buttered cookie sheet. Make sure and use a cookie sheet that has a lip or a side to it.

IMG_6324

  • Cool completely. I always put it in the refrigerator to cool. Cut into pieces and serve. Store in an airtight container. This recipe makes about 60-70 pieces depending upon how large you cut them.

IMG_6362

You can see the texture in this photo. They are rich and delicious. You only need one or two small pieces and you are completely satisfied! Don’t let my photo fool you. This little plate is 4 x 4 so the pieces of fudge are really small. I am not a food blogger so my treats never look quite as good in pictures as they taste in real life.

IMG_6365

Image Map

Image Map

Image Map Image Map